Rigging the AR Drone with head lights

This weekend I set about adding some bright LED strips to the front of my AR Drone's indoor hull. The large curved strips of foam seemed like the perfect testbed for adding some night time lighting to my drone.
The lights
I started with an LED strip that I bought from Amazon; these things are great, they run on just 12v, and can be cut into any length so long as the number of LEDs in the strip is a multiple of three.
Being careful to position the strip so that the LEDs wouldn't blind the drone's camera, and that they would include a nice curve to each side, I worked out roughly how long I wanted one piece. Where to cut was dictated by the convenient dotted line placed between every three LEDs. Cutting along this line provides convenient contacts to either solder to, or use small crimping connectors.
After cutting a second piece at the same length, I needed to attach wires to provide power.
Tip: Make sure you cut the power wires long enough to feed through the body of your drone with a little excess.
This turned out to be a tricky part of the operation, and I would recommend testing your technique on a small piece of LED strip first.
To expose the pads you need to remove some of the transparent plastic coating covering the circuit and components. I found I was able to get a fingernail under this coating from the edge of the strip, and pull it away from the circuit. I lifted just enough to expose the pads below, and then cut it away with side cutters.
Soldering
You need to carefully solder wires on to the two pads so that you can provide the 12v power it needs to run. Do be careful not put too much heat onto the pads here as you may ruin the contacts. I recommend pre-tinning your wires and if need be using a little flux to make a fast and secure join.
Once you've attached your wires test that they work by connecting them to a 12v supply. If you don't have a bench power supply, a simple plug-in transformer will do. My LED strip came with a barrel connector. I used a 12v 2.1A plug I had laying around.
If everything is working correctly you can go ahead and attach the strips to the foam. Remember to face the wires toward the center, you'll need to feed them through to connect to the battery.
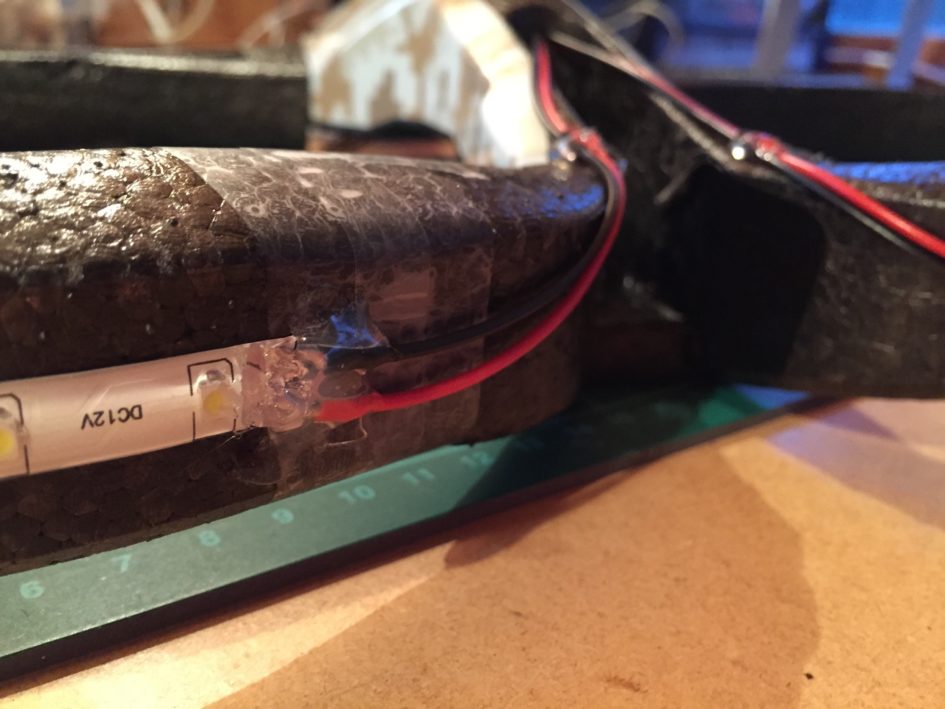
Once you've attached the wires, and your strips are glued in place, it may be a good idea to provide a little hot glue to ensure they're secure.
You now need to make a hole to feed the wires through. This part can be fiddly. I used a small drill to get started, though it wasn't long before it would not go any further. Switch to a screwdriver with a long handle, but small head. Gently twist the screwdriver further into the space the drill bit had created. Eventually it popped through to the other side and I carefully fed the wires through.
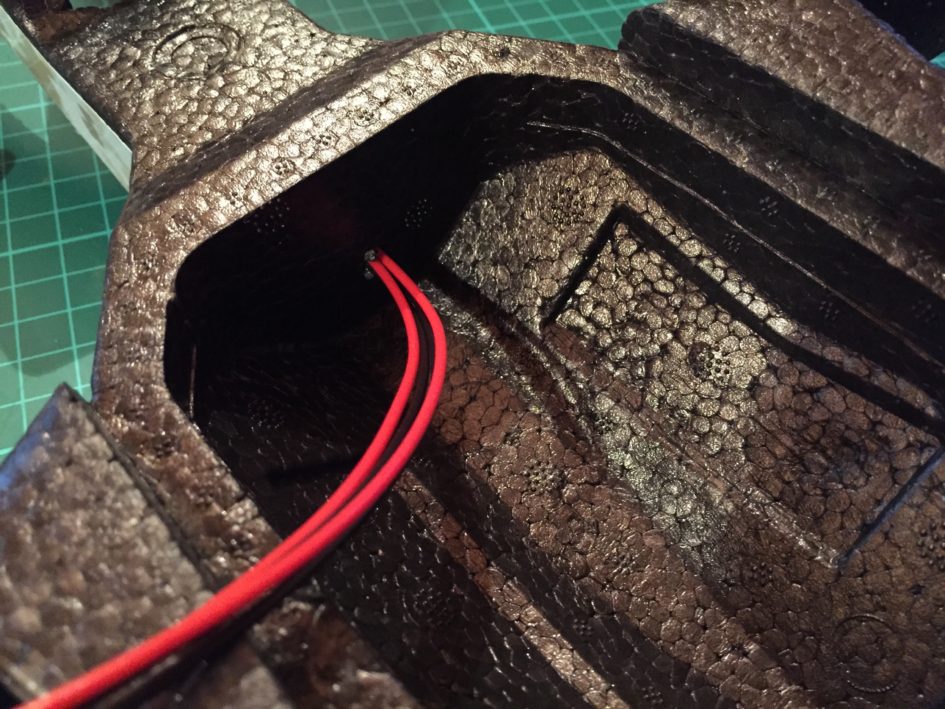
If you wire the new LEDs directly into your drone, your Indoor hull won't be very removable, so we'll use a connector to easily add or remove them as we wish.
Connecting it up
That's all there is to it. You can now connect your lights up when you like, and fly at night.